
I found a version of the helmet that someone had made and unfolded in Pepakura. I printed it out and proceeded to make it out of cardstock. The only thing is that it was designed too narrow so it would end up being too tall if the width was made to fit me.
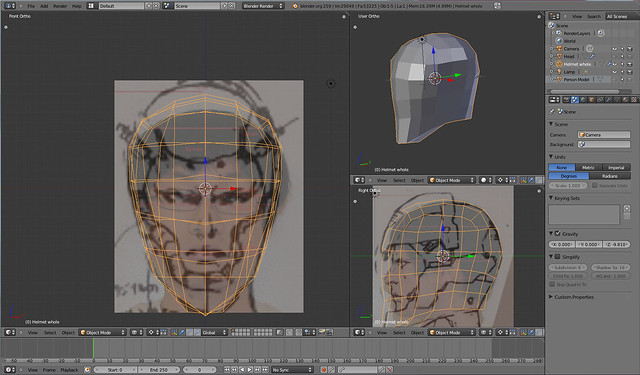
I decided I'd give 3D modeling a shot and started creating the helmet in Blender. I made the helmet in one piece for 2 reasons - I wasn't confident in modeling multiple pieces that need to fit together and it would be easier to model just a single piece. The plan is to make the helmet and then cut it apart later.
I got a bunch of reference images and took some pictures of my head with the helmet superimposed so I could use it as reference when making the 3D model. I don't really have a background with 3D modeling so I had to read a lot of tutorials first.
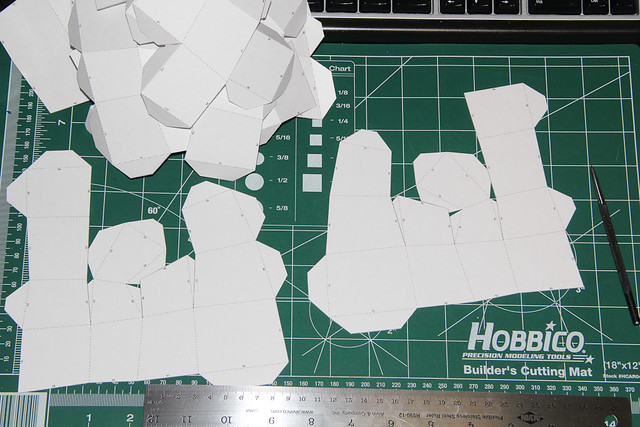
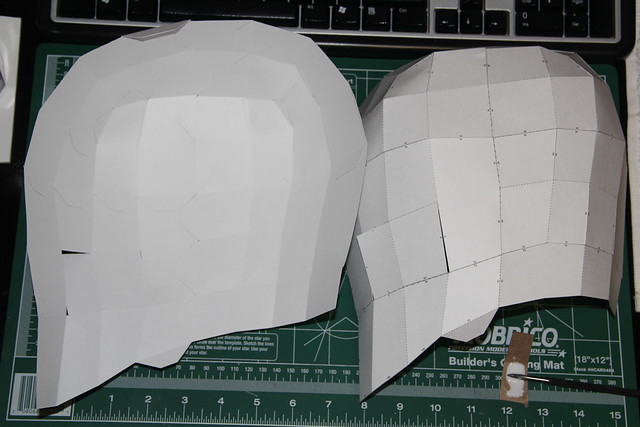
Next, the finished model is exported to Pepakura and unfolded. This is then printed out onto 110 lb. cardstock and then cut out.
The pieces are scribed with a ruler along all the lines that need to be folded so the folds are really crisp. The pieces are then glued using regular Elmer's white glue. A thin layer is optimal so you don't have to hold it for minutes waiting for it to dry.
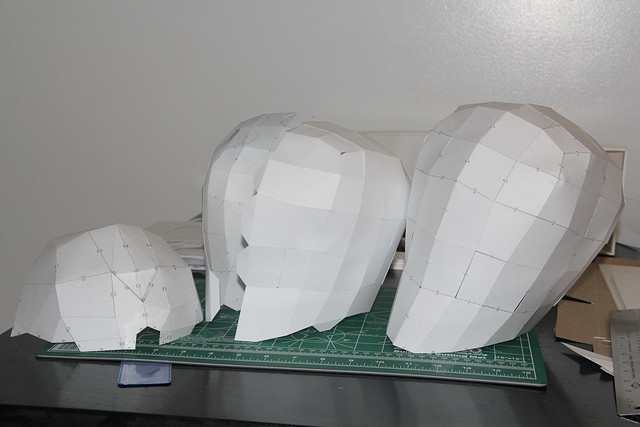
The way the helmet is designed I can't put it on to check the fit so I was only able to check for an approximate fit when half of the helmet was glued. The helmet narrows in size around the mouth area so it can't just slip on.
I actually made three different Pepakura models. The first one was using a Pepakura model someone made and unfolded but after making the forehead piece I didn't really like the shape so I decided to make my own from the beginning stage of making a model. The second one was a bit small so I rescaled and the final one came out the right size.
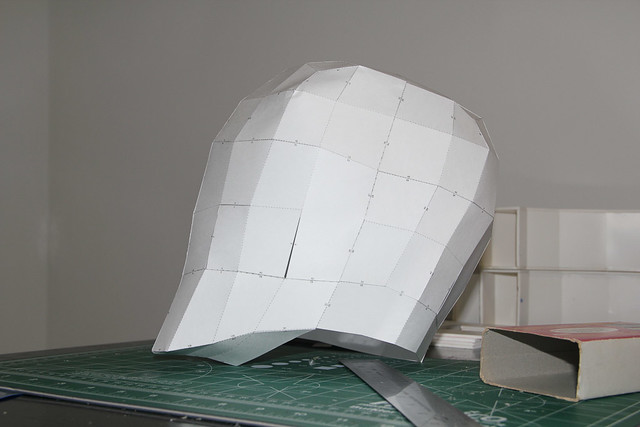
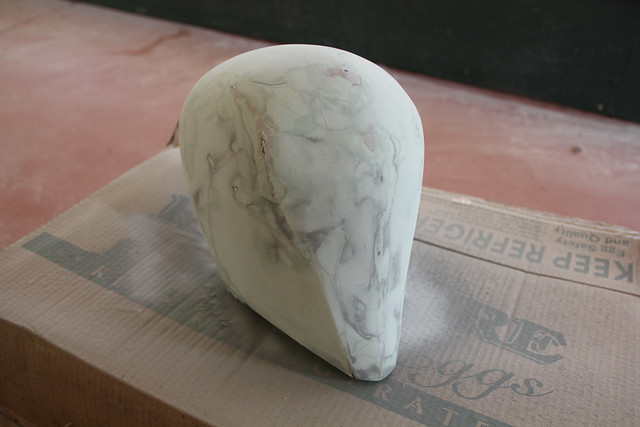
Here's the profile of the Pepakura model.
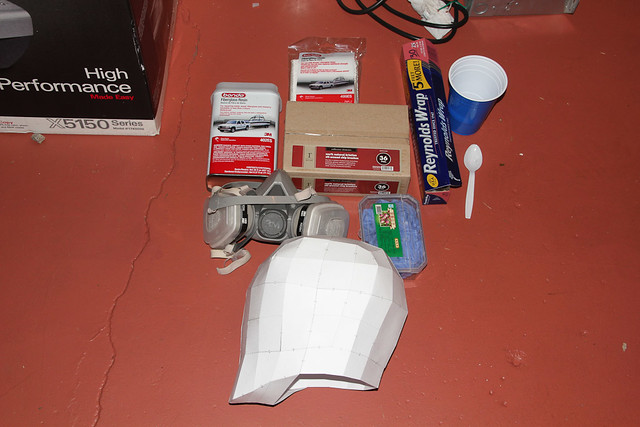
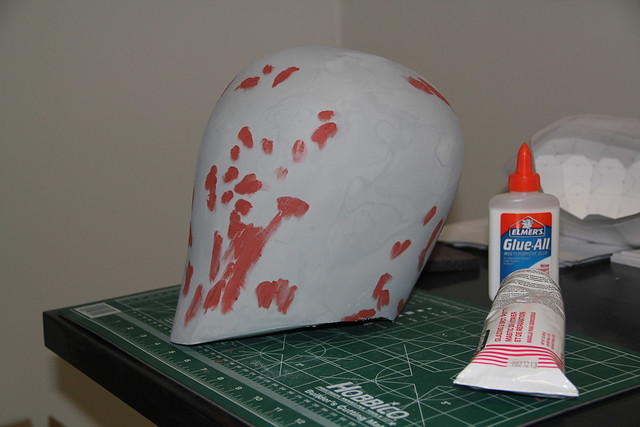
The supplies I'm using for resin and fiberglassing. The chip brushes were from Harbor Freight. Be sure to wear a respirator when using resin and fiberglass. A simple dust mask doesn't stop the organic fumes.
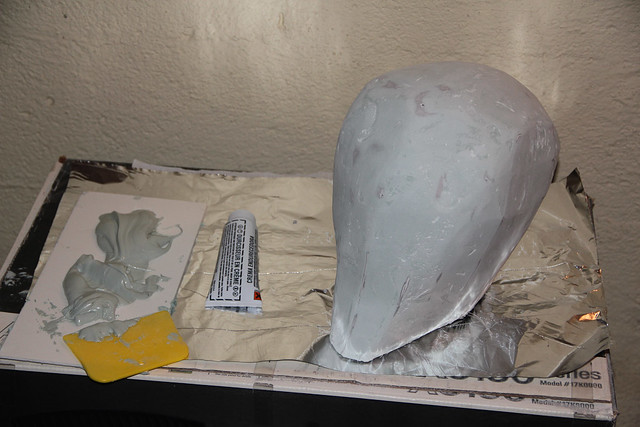
The entire outside of the helmet is coated with a layer of resin and then the inside gets some resin and about 2 layers of fiberglass cloth. Make sure to tap the resin into the fiberglass and not just simply brush it on. 2StoryProps has a nice tutorial on the process complete with videos. Also, resin can eat through certain plastics including that blue cup you see there. I know some people use plastic cups so I guess these were just cheaper plastic. I had some Yogurt containers and that worked fine.
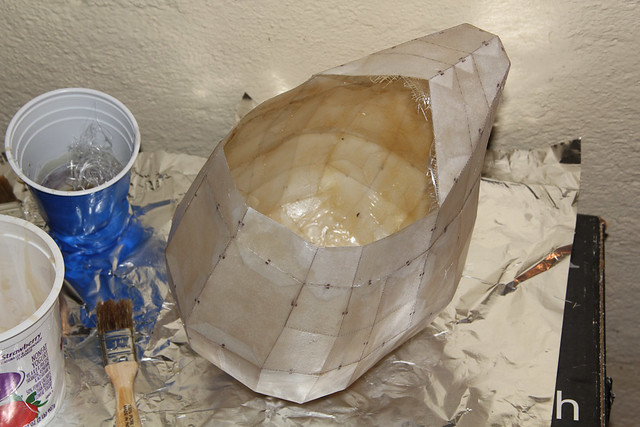
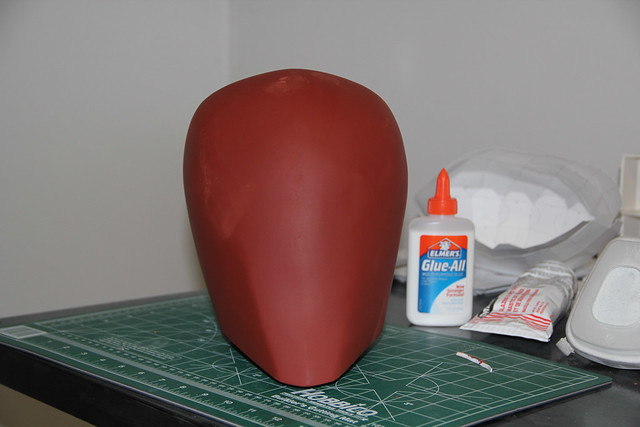
When the fiberglass and resin dries the helmet becomes very stiff but still remains very light.
Body filler is then put all over the helmet and the cycle of body filler and sanding begins. Spreading the body filler in thin layers helps to minimize the amount of air bubbles.
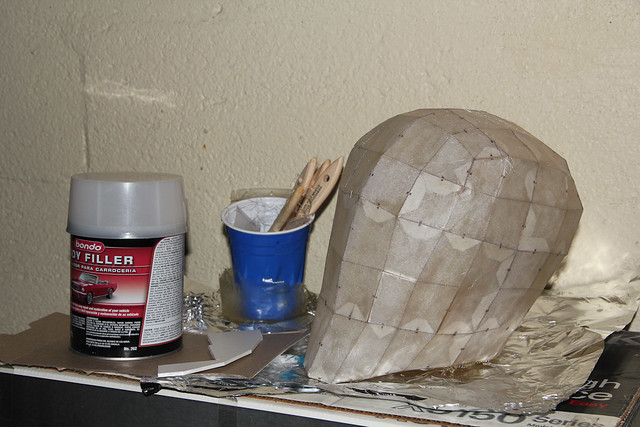
I started off using Bondo brand body filler but it's not the best to work with in terms of spreading and sanding. I heard about Evercoat Z-Grip from a friend a while back and decided to give it a try. It's specifically made for automotive use so you can only find it at certain stores. I got mine at Carquest.
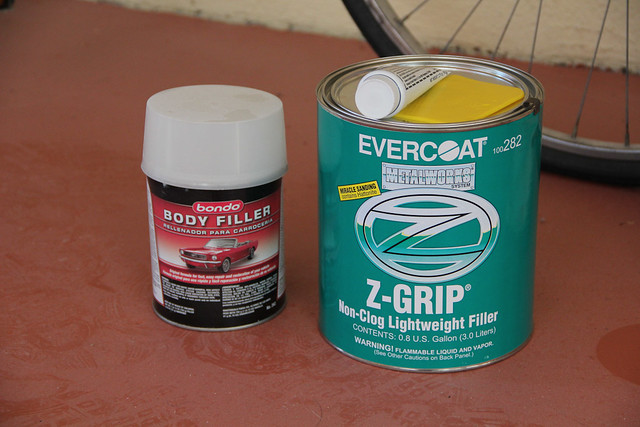
Here's some body filler being mixed up. It has a slight greenish tint. I also picked up a spreader which is made of flexible rubber so you can pop off the hardened body filler when you're done.
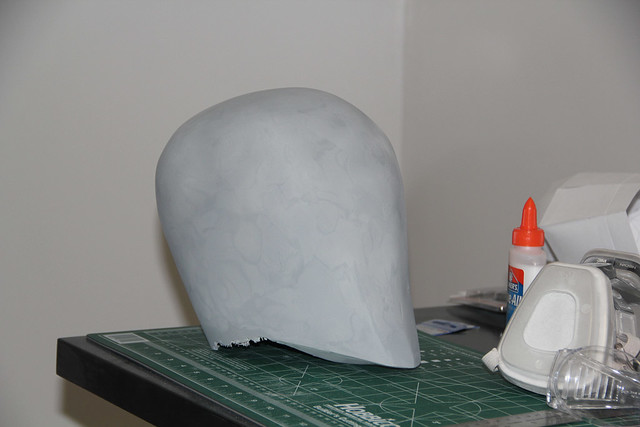
After a few rounds of body filler I sprayed a coat of gray primer to make it easier to see what needs work. The gray primer I'm using is Rust-Oleum Automotive self etching primer since I had some left over from working with resin model kits.
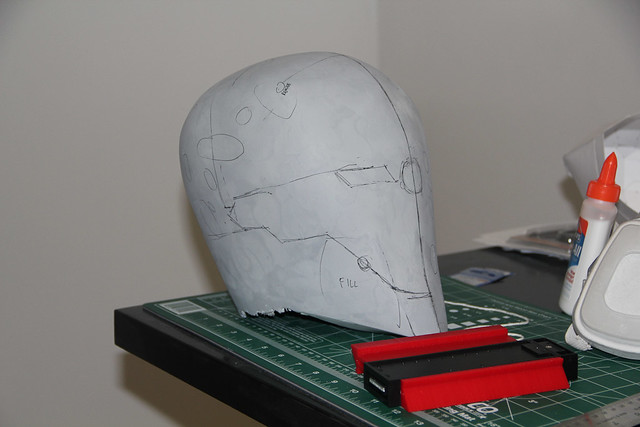
I decided to pick up a contour gauge so I could make the helmet more symmetrical. I also played around and drew on what the final helmet would look like.
Some areas are patched and then sanded again. Here you can see the various layers of body filler and primer. Light gray is Bondo, dark gray is primer and the light green is Evercoat Z-Grip.
Another coat of gray primer to check for defects. Then it's time for the spot putty for small defects. It was a lot cheaper to get the super huge size of spot putty.
A coat of brown primer. Here I'm using Krylon brand since it's cheaper.
If you look closely you can see that I filled in the right cheek (left side of screen) a bit more to match the left.
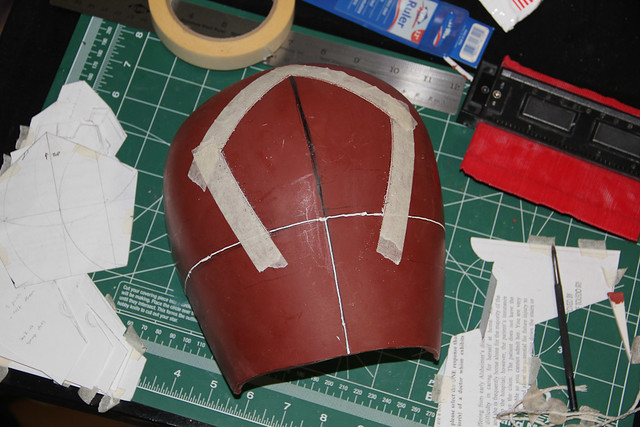
I made a paper template to get the shape I need to cut out. I think I made at least 10 different versions. You can also see the string that I'm using to mark straight lines for reference on the helmet.

I tried using a Dremel to make the lines but it was difficult to get a really straight line which is evidenced by the horizontal and vertical lines. The pentagon was first drawn on paper using this method and then traced it on to the helmet. I used two layers of masking tape for a bit of added thickness and then scribed it using a scriber then went over it with a small needle file.
The pieces were cut apart using a Dremel. It was actually cut apart before the last picture but I forgot to take a picture of the pieces until after. The problem of using the Dremel is that the cutting tool isn't the thickness of a piece of paper so you end up with approximately a 2mm gap in between all pieces.
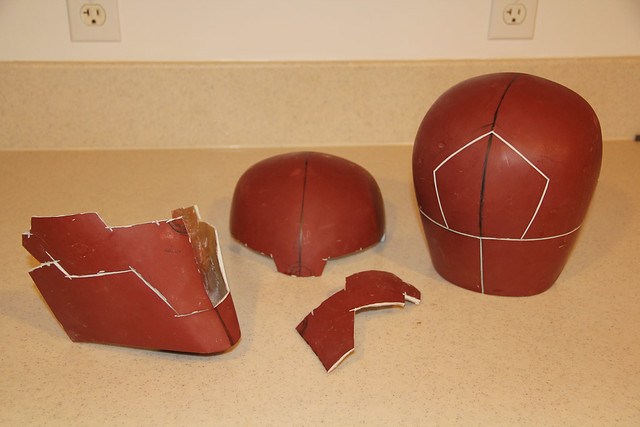
I'm currently working on filling in all the gaps between pieces so it comes together cleanly. I tried the helmet after it was cut apart and it does indeed fit me. It's snug around the ears but it's not too bad. The reason for this is that there's about 0.5cm extra thickness due to the body filler to get the outside smooth. I probably don't need it this thick if I cast it. My initial plan was to cast this if there's some interest so if that happens there will be more room around the ears.
hi! great job!
ReplyDeletecan i ask to you the pepakura file to try to do this wonderful MGS character?
Thx Andrea
http://www.mediafire.com/?fi5mvhb88mg8ffo
ReplyDeletePlease don't share it without giving credit. Good luck with making the helmet.
Does this file work with normal a4 size paper
DeleteIt might not print directly. I printed it out on American Letter sized paper (8.5 x 11 inches) and you will more than likely need to move some things around to make sure it fits onto A4 paper. Just change the layout in Pepakura so it prints to A4 and then move pieces around as necessary. Word of caution - my head is about 22 inches around (size 7 hat). The way I had it scaled it was a bit tight even for me. Depending on your head size you may need to scale it up accordingly. I don't have much advice for how to scale it other than to look at the dimensions it gives in Pepakura (height and width of the model) and measure your own facial dimensions and add some room for spacing.
Deletecheers and almost forgot wonderful build and scalp
DeleteThanks for the kind words. Someone else recently made a even better version than mine. You may want to check out his build thread. I think there's even some better pep files in the thread.
Deletehttp://www.therpf.com/f24/diegators-grey-fox-cyborg-ninja-completed-154562/