Friday, April 10, 2015

Steak and Thomas Keller Inspired Meals

I had an urge of inspiration lately and wanted to cook some ambitious meals. I recently had some good news about my career and wanted to celebrate so I thought a nice steak would be fitting.

The first meal I cooked was centered around a ribeye I got from a local butcher, Cooper Bros. This is a local butcher that was founded about a year ago in Lexington, KY. The ribeye I got was $23.99/lb which is pricey but it's locally sourced and is supposed to be really good. I talked to the butcher and he suggested that next time I should look into getting "chuck steak" which is similar to ribeye but a much cheaper cut.

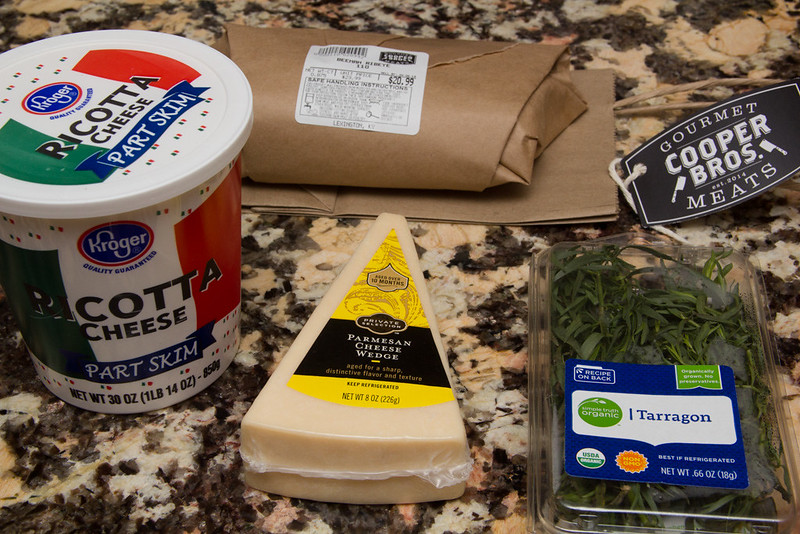
I also had some Ricotta and Parmesean which I got to make some gnudi but it turned into a huge mushy mess much to my chagrin. I don't have any good pictures of the mess but when I cooked the gnudi in water it pretty much disintegrated. I tried making it again a few days later after putting the leftover uncooked gnudi in the freezer and just sautéing it in some butter and not bothering with boiling it in water. It turned out much better this way with the outside being slightly brown while the inside was nice and soft and oh so cheesy.


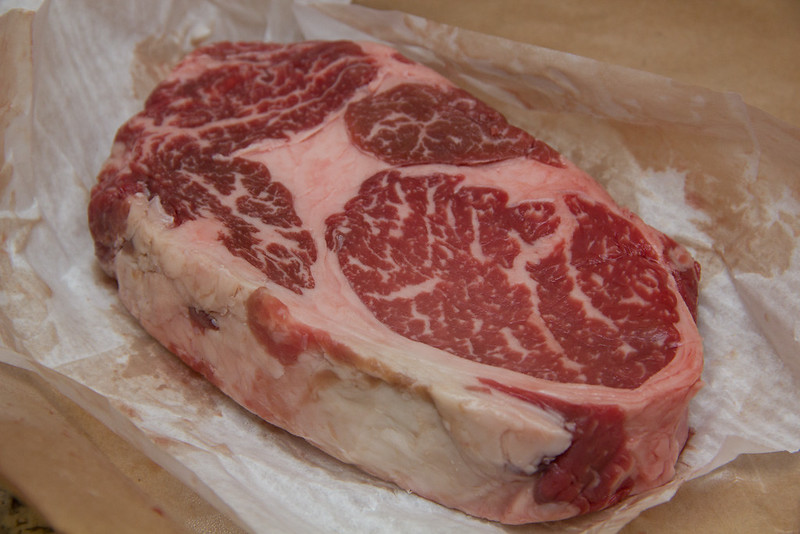
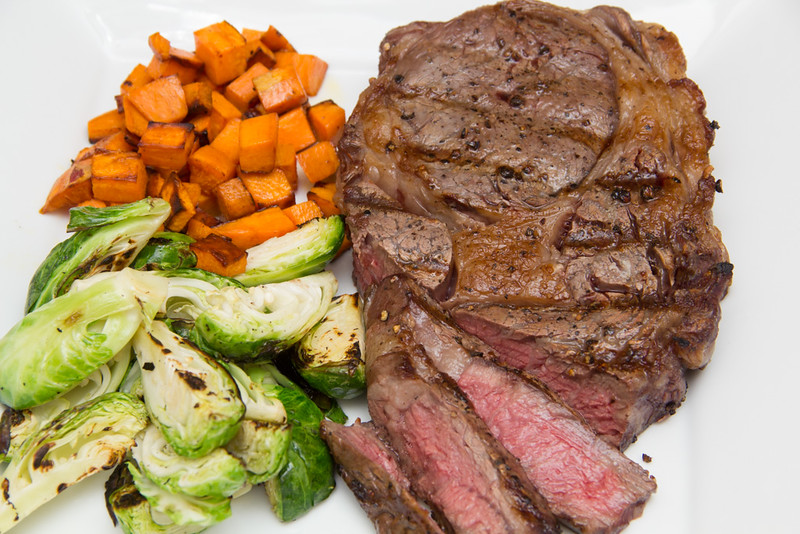
Here's the ribeye. You can see the really nice marbling throughout.


I wanted to make this in a way to highlight the natural flavor so I used just kosher salt and fresh ground black pepper. I seasoned it about 2 hours before I cooked it after having it sit out for about 2 hours to help temper it.


I cooked this on a gas grill which was at a temperature of about 350F inside. I checked the internal temperature of the steak, turned it twice, and took it off the grill when it hit an internal temperature of 130F. I then let it rest for about 10 minutes before slicing it.
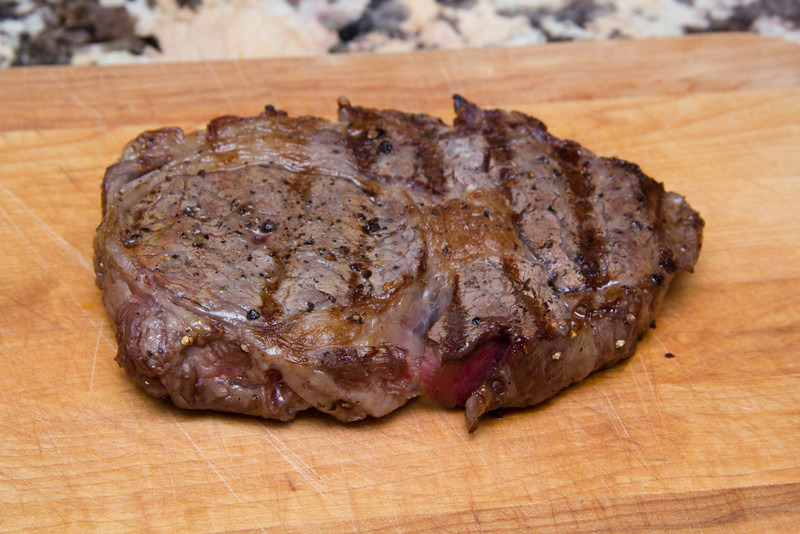


I made some sweet potatoes and Brussels sprouts as sides. The ribeye was sliced against the grain which makes it taste much more tender:


I also made some Béarnaise sauce since I've read that it's the only fitting sauce for a nice steak. I haven't made many sauces and not even Hollandaise so this was a challenge for me. It turned out alright but after I took it off the burner for about 10 minutes (so I could plate and get ready to take pictures) it separated which stressed me out a lot. I was seriously about to just throw the sauce out and just throw my hands in the air in frustration. Then I found this video (the video is for Hollandaise but it applies to Béarnaise since Béarnaise is directly related to the mother sauce of Hollandaise) and managed to rescue the sauce.
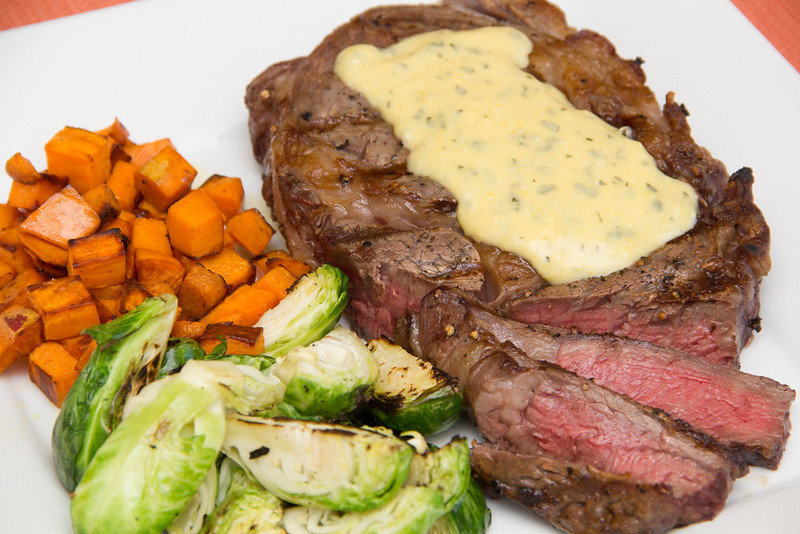


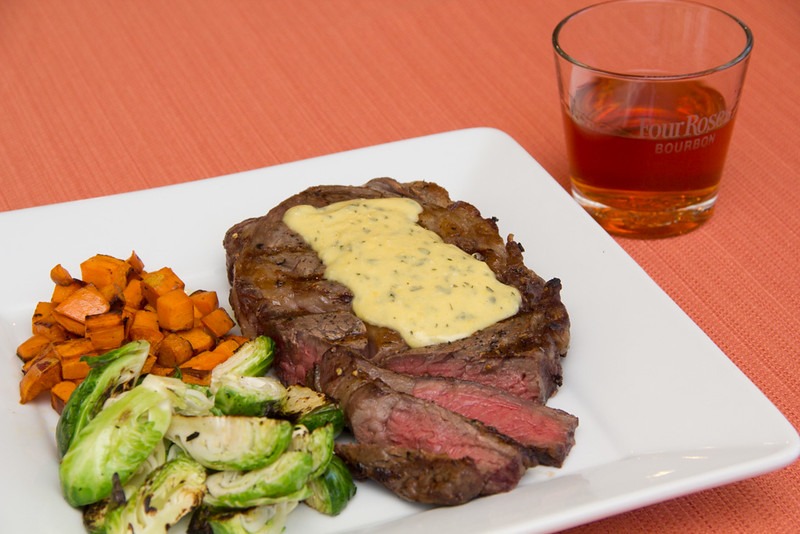
Here it is paired with a nice Old Fashioned made with Four Roses Yellow Label. I forgot to buy oranges so there's no orange peel as a garnish. I'm quite happy with the photography of this meal.


The next night I based the meal around Thomas Keller recipes. I started off with something I've been wanting to make for a few years: Ratatouille. Technically it's called Confit Byaldi but the version that a lot of people are familiar with is the version you see in Pixar's Ratatouille. Well, what actually happened is that Brad Bird had Thomas Keller as a consultant for the film and asked him to make a version of the French dish Ratatouille that would look more stunning on screen. Confit byaldi was first documented by Michel Guérard but modified by Thomas Keller in his 1999 cookbook, The French Laundry Cookbook.


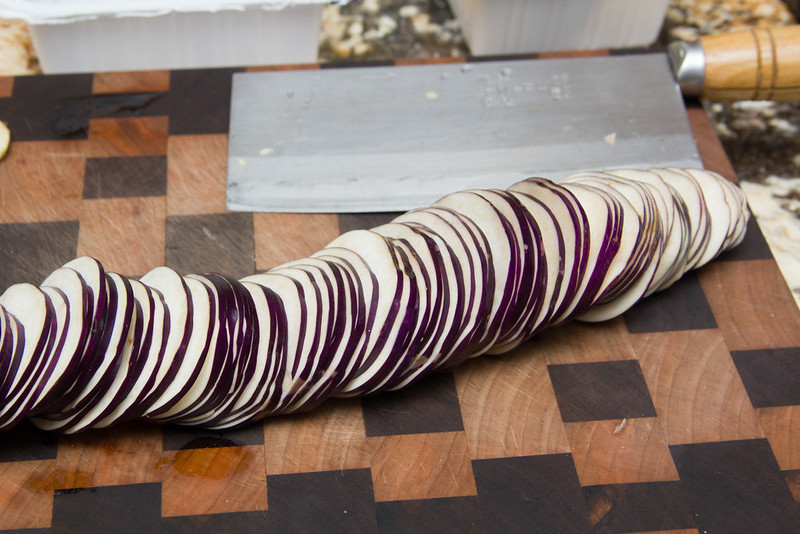
I followed this recipe. Here's a picture of me slicing the Asian eggplant with my Chinese cleaver. If I were to make this again I'd probably invest in a mandolin slicer. I'm also planning on getting a good knife soon as the Chinese cleaver isn't as precise as I'd like.


The piperade:


Before going in the oven:
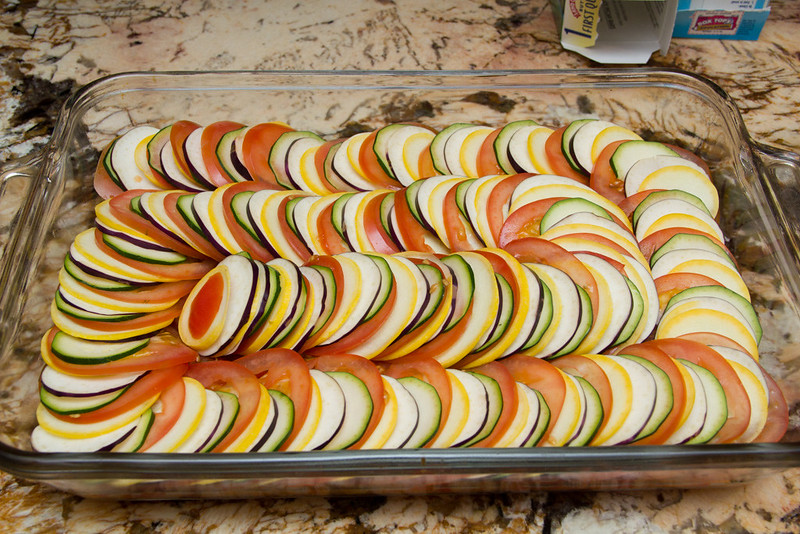


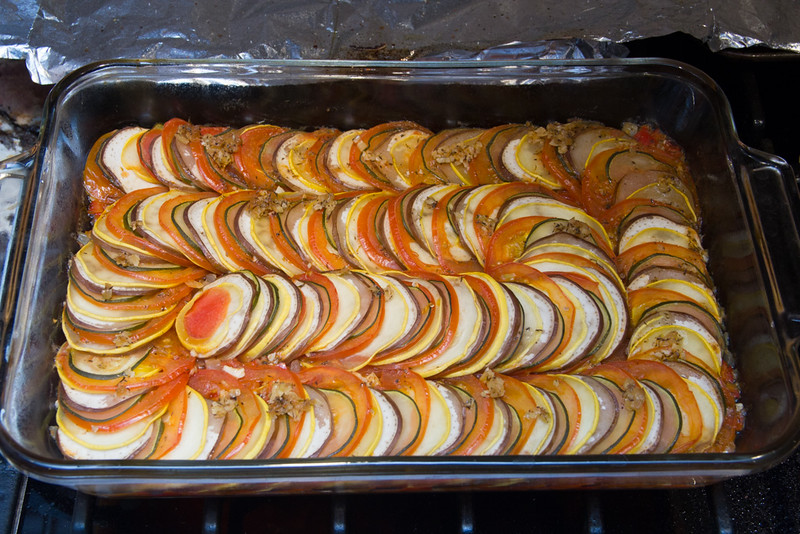
Fresh out of the oven:


Here's my plating of the confit byaldi with the vinagrette. I'm just recently getting into elevating my plating and I think it's an OK attempt but could use a bit more work.
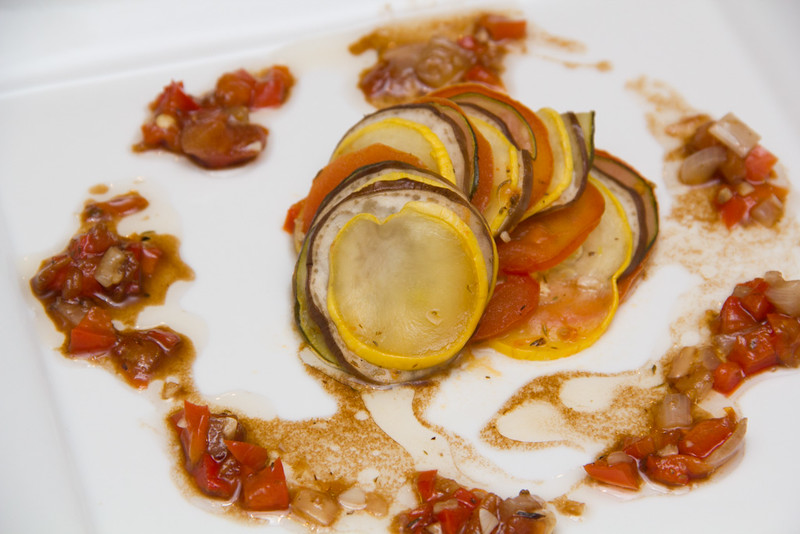


Slightly more "artsy" picture:


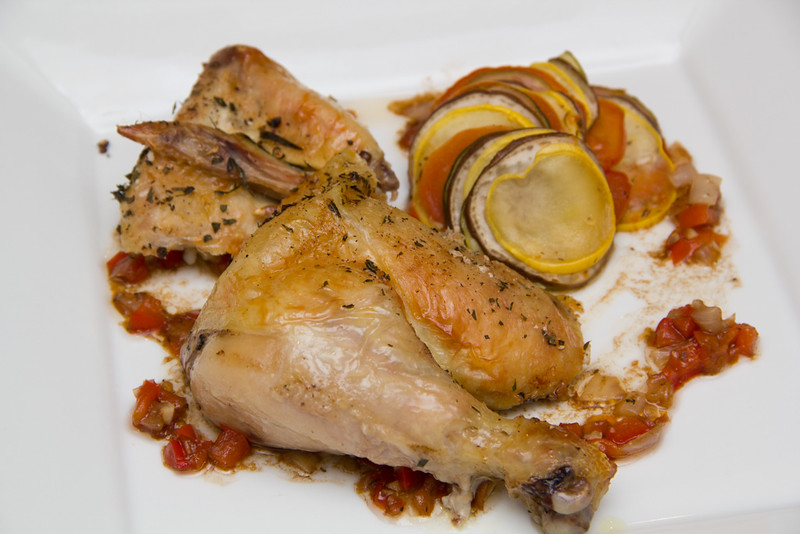
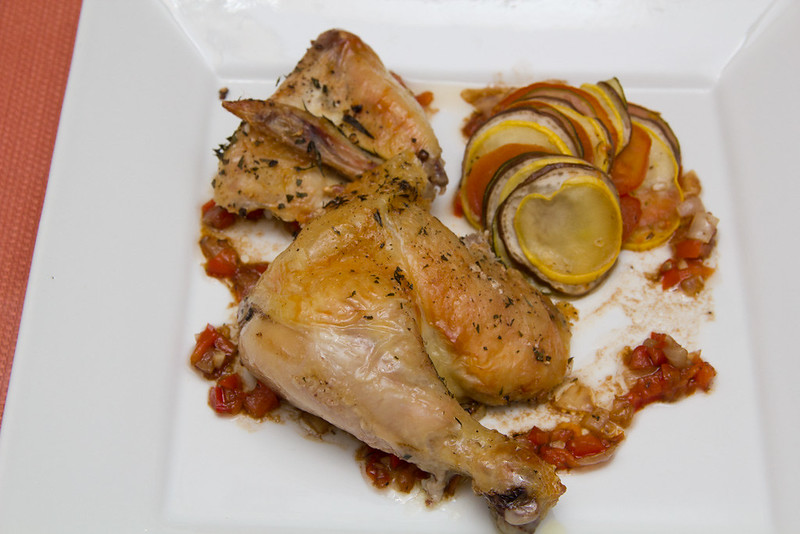
I also did a roasted chicken which is one of the things Thomas Keller is known for.


Roasted chicken and confit byaldi:


Samsung 220WM Repair

I've been absent for quite some time due to some major changes going on with my life and career path. I may expound more on that in the future but suffice it to say I think it's a good direction for me.

About a year and a half ago I started noticing some issues with my Samsung 220WM LCD monitor which I purchased Fall of 2007. It served me well but it started having issues turning on sometimes. Then a year ago it stopped turning on at all at which point I went to Best Buy and purchased a LG 23EA63 LED monitor.

I recall reading on reddit at some point about someone repairing an old broken monitor by replacing some blown capacitors. I'm not sure why it's taken this long but a couple of weeks ago I decided to disassemble my broken Samsung monitor to see if I could identify any blown capacitors.

I started off by removing the desk mount which is held in by 4 screws, then proceeded to pry open the plastic bezel. I did this using some metal putty knives (the ones you use to patch up your drywall). At first I was pretty scared of breaking the plastic but you can actually be pretty rough with it. I started off at the bottom corners, worked my way up the sides a bit, then opened up the entire bottom edge before working my way all the way around.

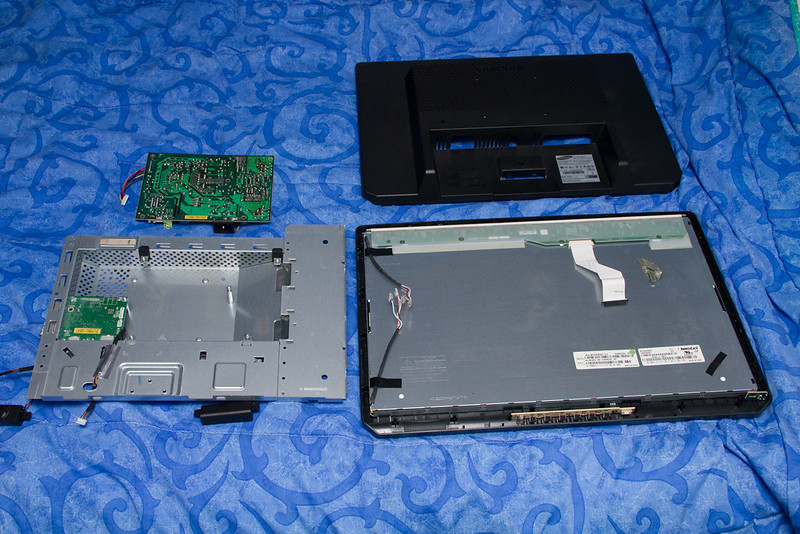
Here's what it looks like after removing the plastic bezels:


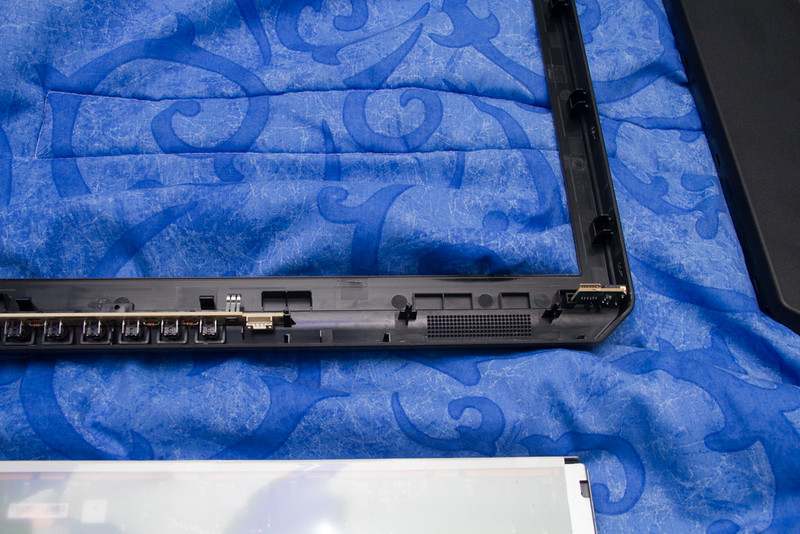
Close-up of the front bezel:


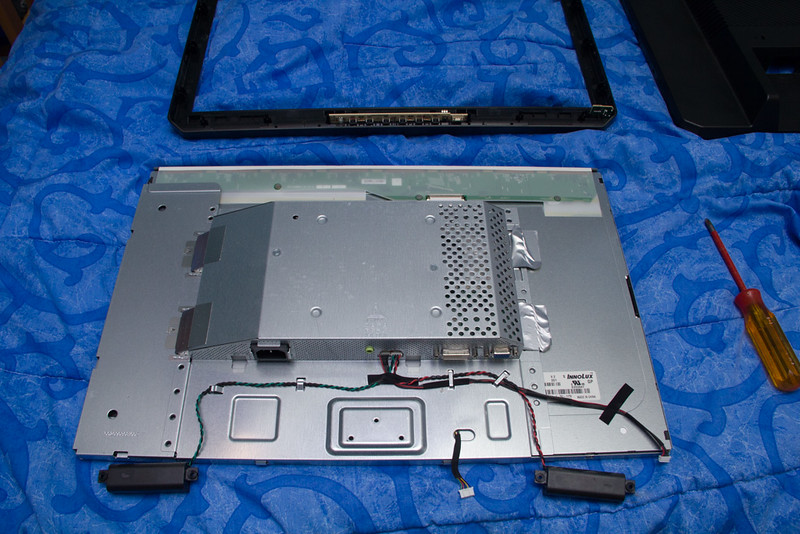
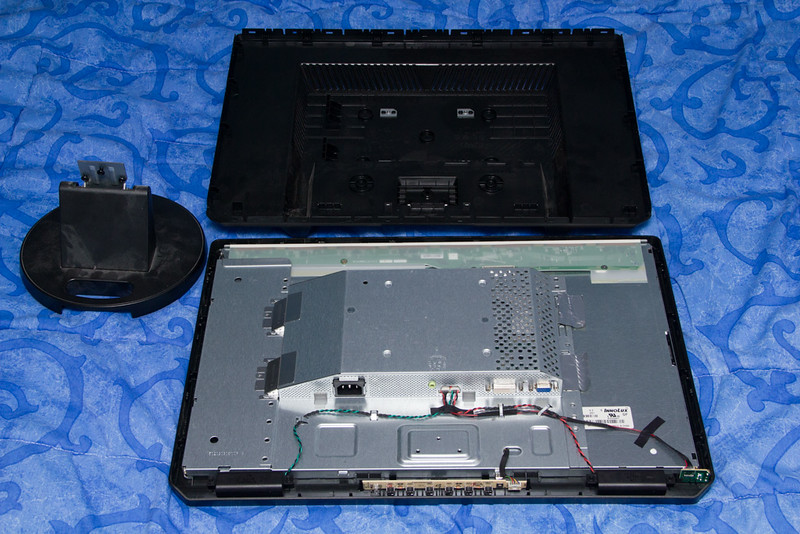
And here's what the back looks like with the bezels removed:


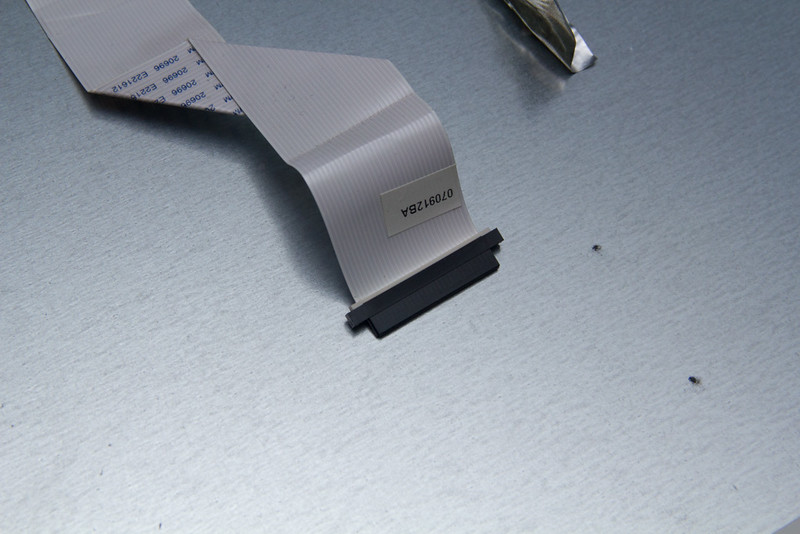
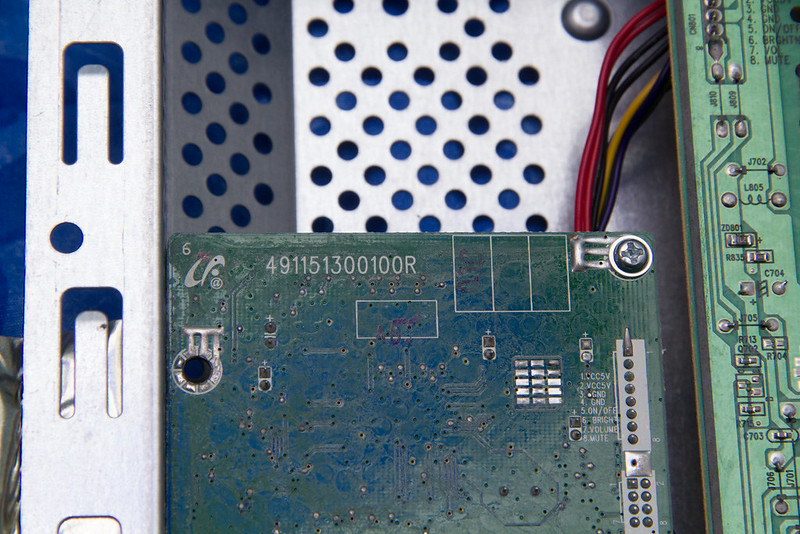
This is the ribbon that goes to the back:


The board on the left side (looking from the back)


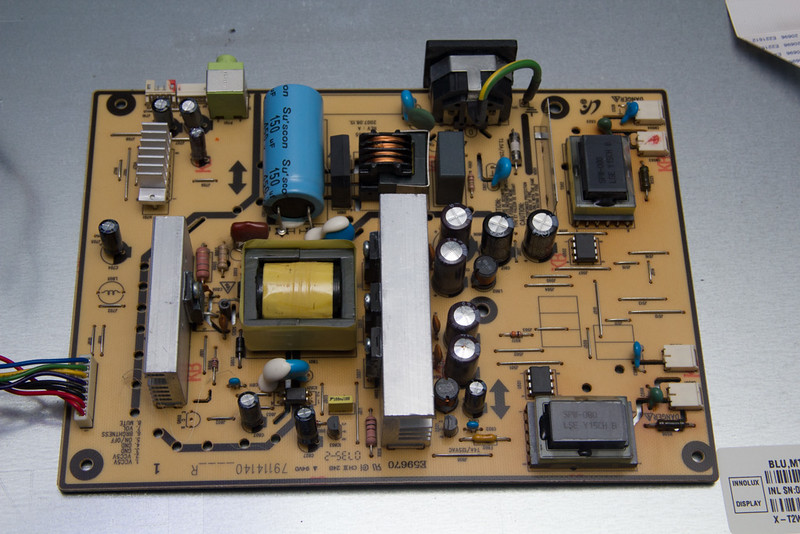
The main board, the one that contains the power supply:


A picture of some of the connector from the speakers for reference:


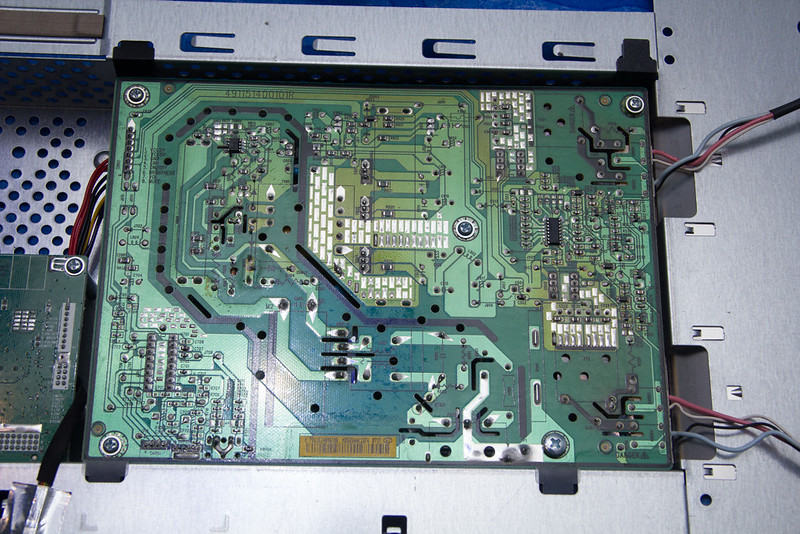
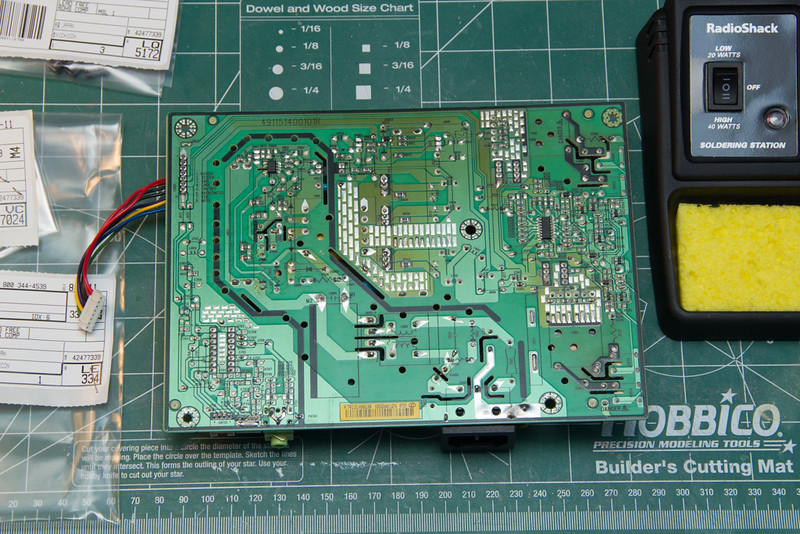
The main board flipped over:


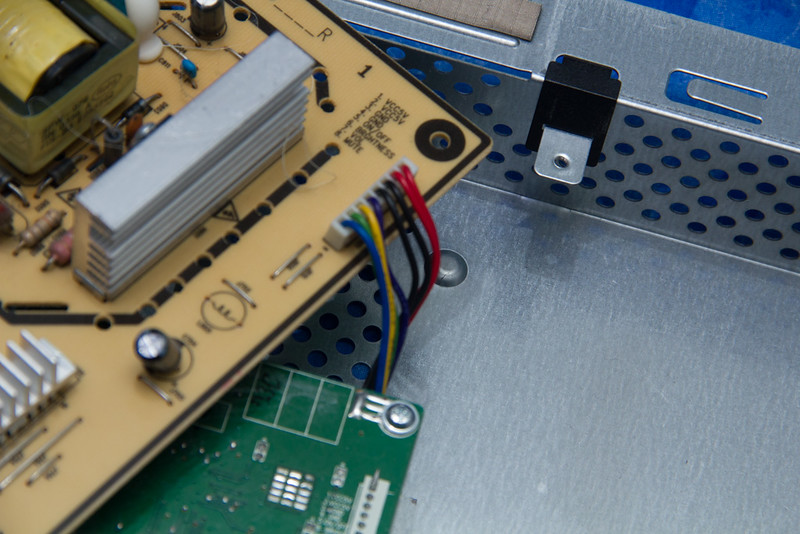
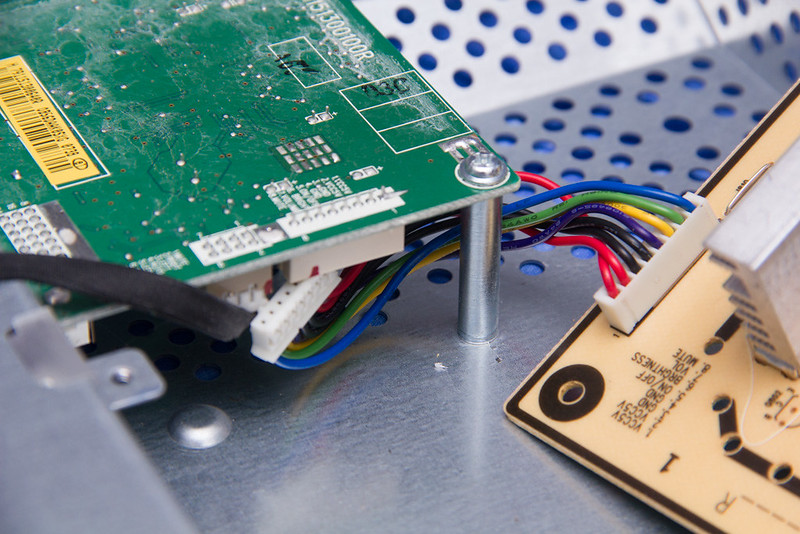
It was tough to remove the connector from the main board so I disconnected it from the other board:


Main board disconnected:


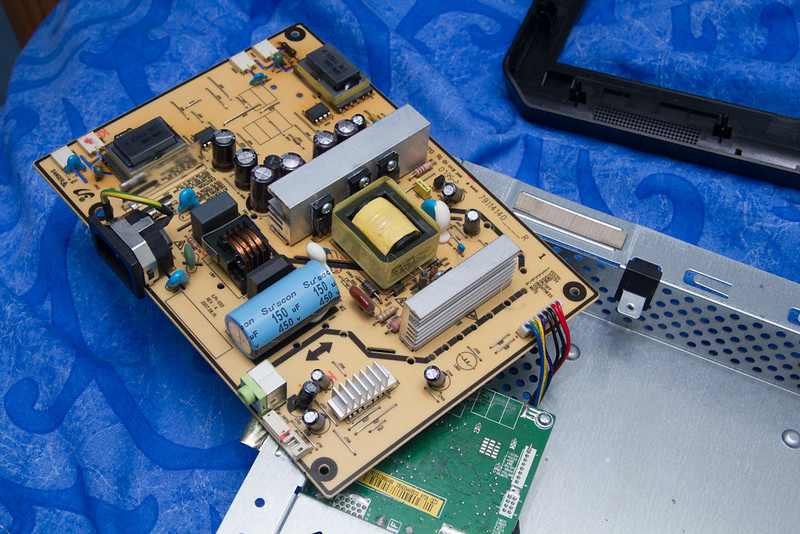
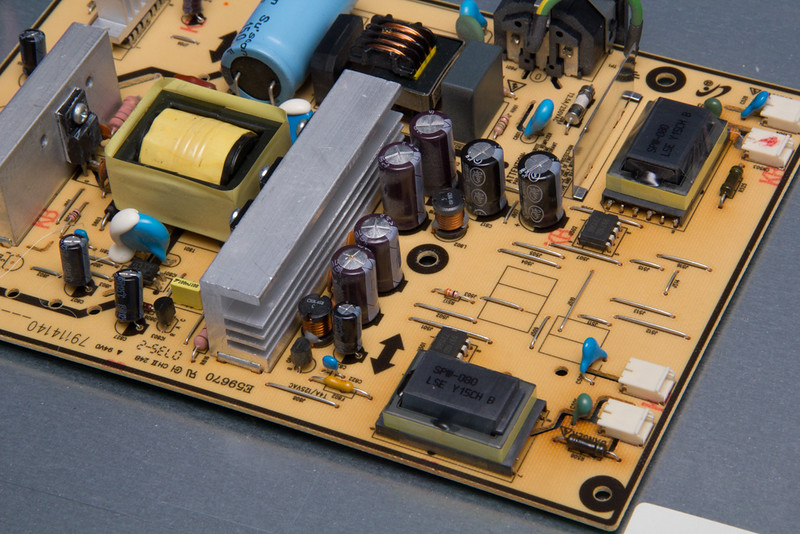
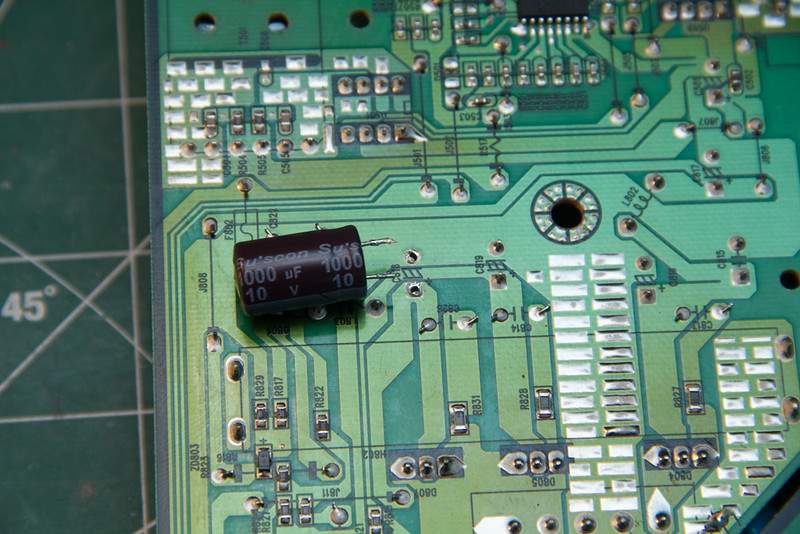
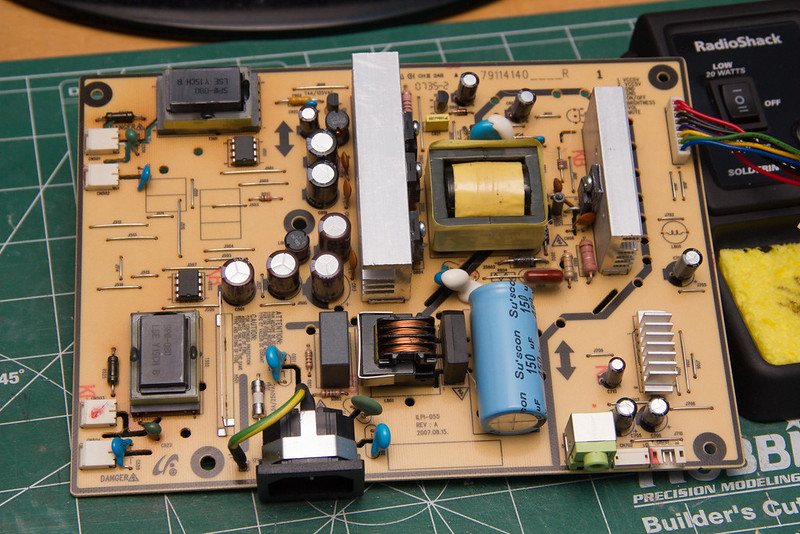
A close-up of the main board. Here you can see some of the blown capacitors which are bulging on the top. A majority of the capacitors are made by Su'scon which is a Taiwanese company. I did some research and found the site Badcaps.net.

They have a list of Bad Caps and also Good Caps

I used the list of Good Caps as a guide when searching for new caps on DigiKey


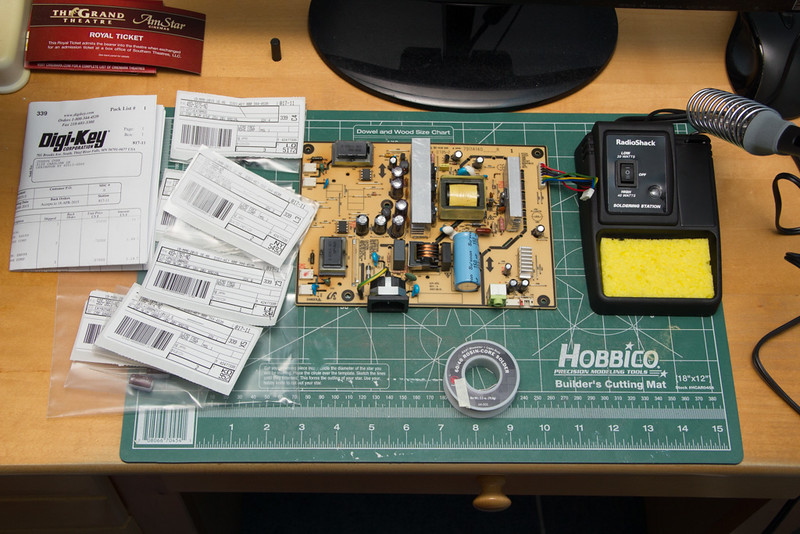
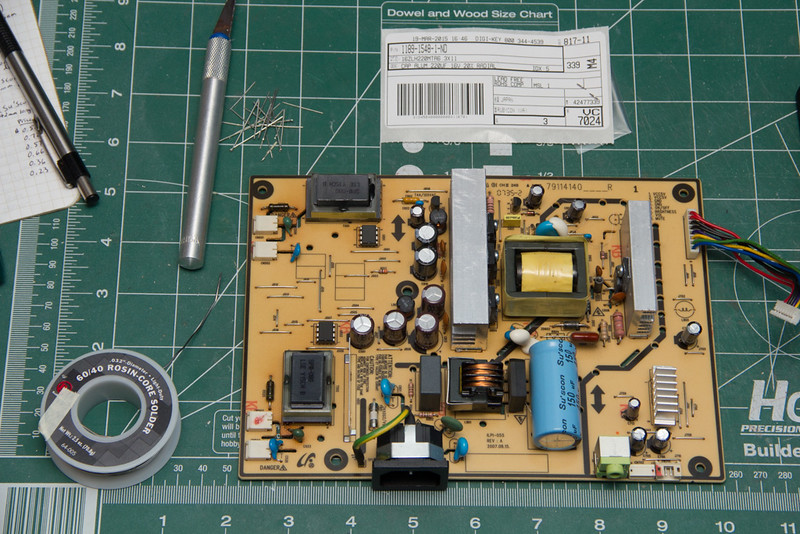
Here's the new capacitors I ordered. I opted to replace a total of 13 capacitors even though only 3 were bulging. I figured for less than $10 I could replace all of them and not have to worry about some other capacitors failing in a few months.

Here's a list of the ones I ordered:

(2) 1000uF 10V Rubycon
(2) 680uF 25V United Chemi-con
(2) 470uF 25V United Chemi-con
(3) 47uF 25V Nichicon
(3) 220uF 16V Rubycon
(1) 10uF 16V Nichicon


First capacitor removed:


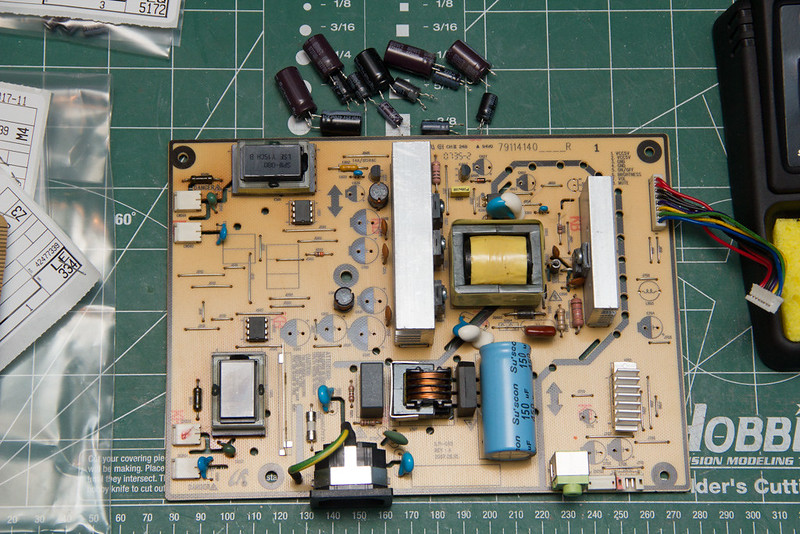
All 13 capacitors removed:


Some of the capacitors


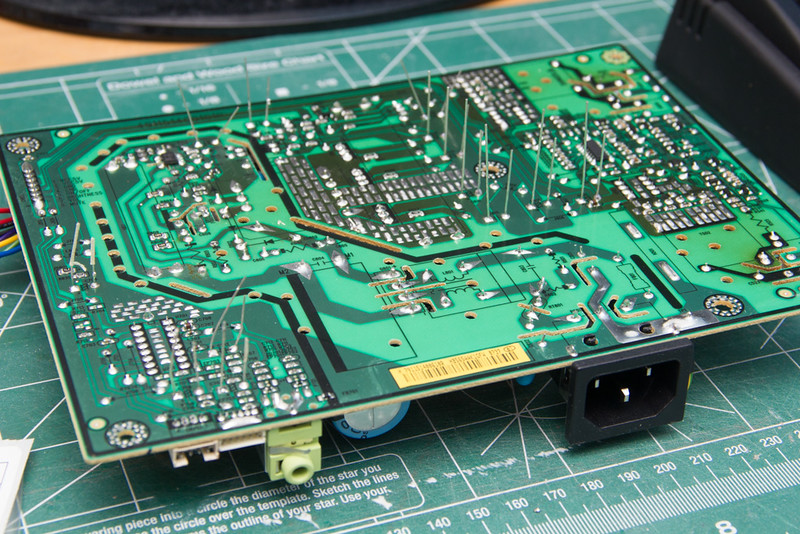
The capacitors soldered. I left all the leads in until I was done so I could snip them together. The last time I soldered anything was when I was in elementary school when my grandpa on my mom's side taught me. It took a couple tries to solder the first capacitor but I got the hang of it pretty quickly. It's so satisfying when you get a nice solder and it just wicks nicely.


The front side of the board with everything soldered. The board is tilted up because of the leads still in the back.


With the leads trimmed the board now sites flat.


All the parts ready to be re-assembled.


Halfway through re-assembly. At this point I hooked it up to my computer to test if it worked. It was a huge relief when it powered on and showed my desktop! I wanted to make sure it worked before snapping the bezel back together since that was honestly the hardest part of the disassembly.


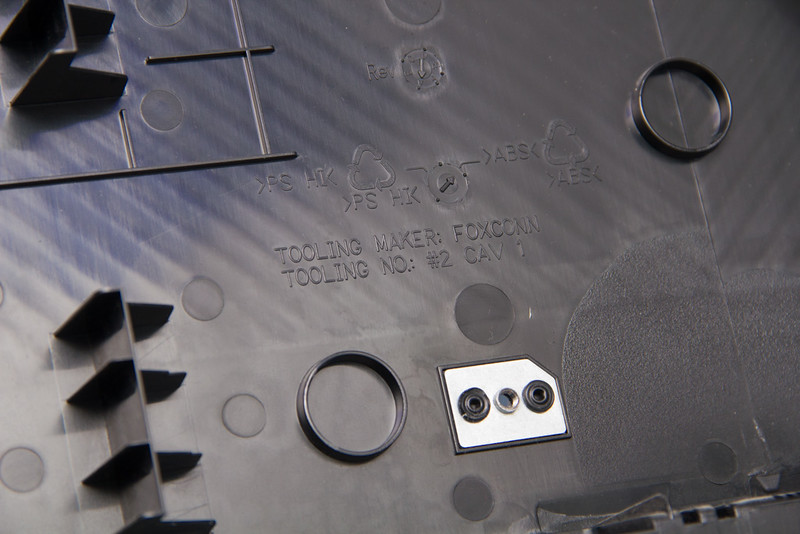
Apparently Foxconn was involved in the making of this monitor:


Double monitor setup!


Friday, December 20, 2013

End Grain Cutting Board

This project was started over Thanksgiving break since I would be at my parent's house for about a week and had access to a table saw and a few other tools. I started off by doing a lot of research into how to go about making this since this is technically my first woodworking project.

The popular choices for woods seems to be maple and walnut as they're both hard and the two woods contrast nicely. I got some lumber from a local shop and ended up spending about $50 on enough to make 2 cutting boards. Plans ended up changing but more on that in a bit. I got the boards planed down to about 1 1/4" thick at the lumber shop since I don't have a planer and they charge $3 per piece which isn't too bad of a price.

I started off making a design for the cutting board using some pretty nifty software called CBDesigner. The only disclaimer is that I had a hard time trying to get it to work on my Windows 7 machine but we have an old Windows XP machine back home that ran it perfectly. This program lets you plan out your cutting board where you can alternate different woods of varying thicknesses. It'll tell you how much wood you need based on table saw blade kerf and other information. It really came in handy.

After that it was off to cutting the boards to the correct widths. I would set the fence up and then cut both a piece of maple and a piece of walnut without moving the fence. This way you ensure that both pieces are as close in dimension as possible.


It's easier to rotate all the pieces 90 degrees to the right (or left, as long as it's all in the same direction). Then just spread a generous amount of wood glue. I used Titebond II here since it's safe for indirect food contact which is what a cutting board will be. Some people use Titebond III but from my research Titebond II works just as well unless you're planning on keeping it submerged. Please don't actually do that to a wood cutting board.

Rotate all the boards and then clamp it together. Leave it for a few hours although overnight is preferred. About 30 minutes in check on the glue squeeze out. If it's not still runny then you can scrape it off to make it easier to clean up the surface later. I didn't actually use any cauls here although I probably should have but I figured I had enough clamps that it was going to be pretty straight.


After everything was dried I used a bench plane to smooth the surface. I don't have a picture of me planing this surface but rest assured it was a time consuming process. If you're going to buy a hand plane from the store, make sure to spend some time tuning it up. They're usually not ready to go straight out of the box.

The glue up was then cut vertically in equal widths of 1 1/2". The reason it's cut to 1 1/2" widths is that when you rotate it the end grain will be facing up and the thickness will be that 1 1/2". I believe the blade kerf of the table saw was around 0.11" when I measured it. It was at this step that I realized that I had glued up the boards in the wrong order from what I had initially planned but the new design has actually grown on me.


The fashionable thing to do is to flip every other strip, like so:


So initially it was supposed to be the really common checker pattern that you see a lot but I like the offset pattern quite a bit.

At this point I could either just make 2 cutting boards that would be 1 1/2" thick or I could make one that's 1 1/2" thick and two that would be half the thickness. I know that you're not "supposed" to go less than 1 1/2" for end grain cutting boards but two of them were going to be presents for relatives. I asked my mom and she said she didn't care if it was only 3/4" thick so that's what ended up happening to the rest of the wood.

Here is the second board being planed. This would then get cut into 3/4" wide strips to make the final board.


And here is the first board glued together. There were cabinet clamps at my parent's house which definitely were necessary for this project. This looks messy with the glue squeeze out but it'll get cleaned up later.


Now at this stage I tried to be really careful and attempt to use the bench plane to smooth out the surface. I don't have the proper hand/bench planes for doing end grain and so it didn't really go very well. I ended up just using a sander to sand the surfaces.

I'm finishing mine with mineral oil and boy was it satisfying watching the oil seep into the wood and really bring out the color and grain. Here's a comparison of with and without mineral oil:


So in the above picture you can see the surface isn't very pretty. That's because of the mishap earlier from trying to plane the surface using the bench plane. After several hours of sanding I was finally happy with how the surface looked.

Here's the finished cutting board! Certainly not perfect but I'm pretty happy with how it turned out.